2.4 — Field Practice
Mapping Heat Pockets, Wind Tunnels, and Water-Retaining Zones
Capstone Field Lesson · Module 2 of 6· Estimated Time: 3–4 hours (including field session)
Prerequisites: Lessons 2.1, 2.2, and 2.3 · Format: Self-study
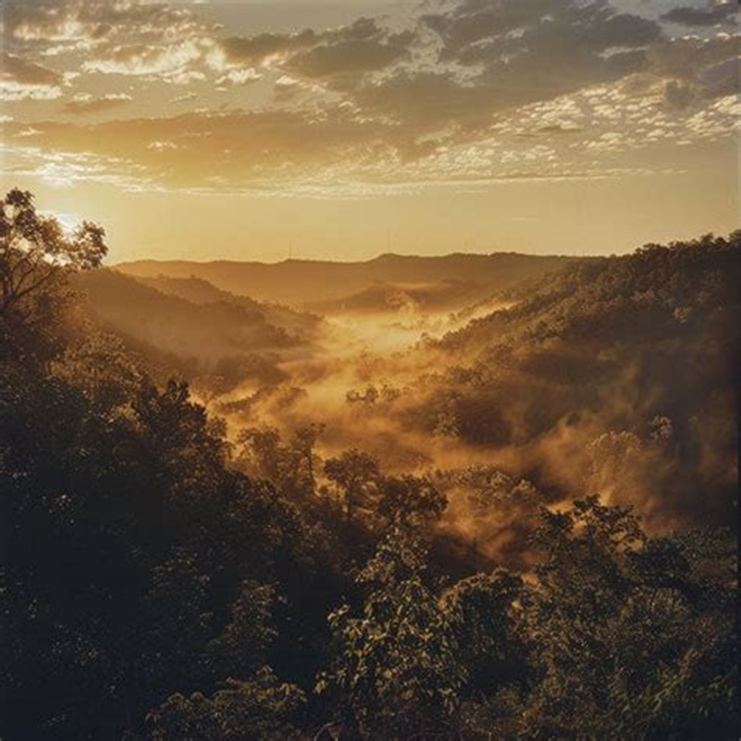
Dawn in the Ozark highlands — mist pooling in hollows, heat building on exposed ridges. The land is already speaking before you arrive
Table of Contents
Opening — The Land as Living Text
You are standing at the gate. It is early — the sun still low enough to throw long shadows from the cedar line, the air still cool enough to carry the smell of last night's dew on limestone. Your journal is in your hand, your pencil behind your ear, and the hillside in front of you is doing what it has always done: breathing. Heat is already rising off the south-facing chert where the rock caught yesterday's sun and held it through the night. Down the slope, in the hollow where the old sycamore leans over the dry creek, the air is ten degrees cooler and thick with the green smell of moisture that hasn't yet burned off. Somewhere between those two places — between the hot ridge and the cool hollow — the wind makes a corridor you can feel on the wet skin of your forearms, even when the leaves are still.
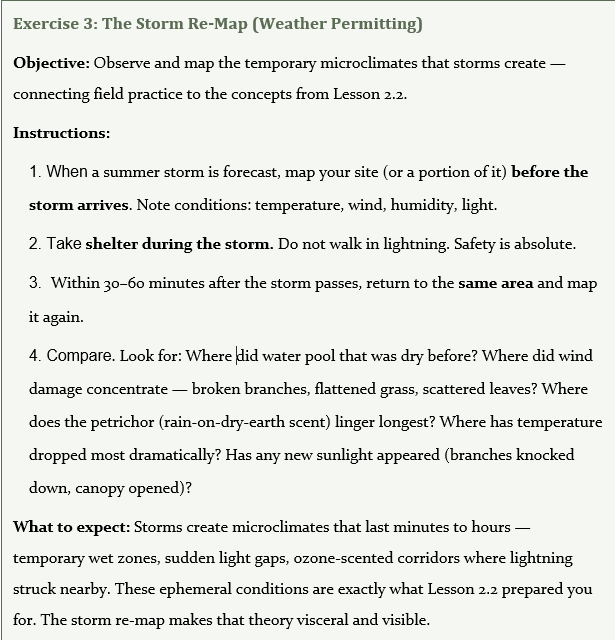
You have spent three lessons learning to read these forces. In Lesson 2.1, you learned the three theaters of summer — ridge heat, hollow humidity, creek cool corridors — as steady-state zones where the Ozark hillside sorts its energy. In Lesson 2.2, you walked into the storm edge, where pressure drops and wind shifts create temporary microclimates that vanish within an hour but leave their signatures on the plants. In Lesson 2.3, you stood at the line between sun and shade and felt how light rewrites a plant's chemistry — the same species making different medicine depending on which side of the canopy gap it roots in. You have learned the language. Now it is time to read the land directly.

This is the capstone lesson of Module 2. There is no lecture to absorb, no diagram to memorize. There is only the walk — slow, attentive, sensory — and the map that emerges from it. What you create today will be rougher than a topographic survey and more useful than any textbook figure. It will be yours: a sensory document of one hillside, on one day, read through your own skin and nose and ears. And it will be, when you learn to interpret it, a medicine map — a guide to what the land is making, and where.
Section 1: Ecological Framing — Why Map?
Microclimate mapping is not an academic exercise. It is the most practical skill an Ozark herbalist can develop, because it answers the question that matters most: Where on this hillside should I look, and what will I find there?
Every practicing herbalist eventually learns that the same species growing in two different locations can produce noticeably different medicine. A monarda rooted on a sun-baked chert ridge, stressed by heat and drought, will concentrate its volatile oils — thymol, carvacrol — into a potent, sharp, almost biting aromatic. The same monarda growing fifty meters downslope in dappled shade near a seep line will be milder, leafier, more diffuse. The plant is the same. The chemistry is different. The difference is the microclimate.
When you map the microclimates of your site, you are mapping the invisible forces that shape plant chemistry. The three theaters of summer you studied in Lesson 2.1 — ridge heat, hollow humidity, creek cool — are the broad strokes. The storm dynamics from Lesson 2.2 add temporal complexity: microclimates that appear and vanish with weather. The light exposure principles from Lesson 2.3 add the energetics layer: sun medicine versus shade medicine, volatile richness versus alkaloid depth. All of these forces converge on the ground beneath your feet, and the map is how you hold them all in view at once.
| 📌 The Core Principle A microclimate map is a medicine map. Knowing WHERE on a hillside a plant grows tells you WHAT chemistry it is making. Mapping is observation made durable — you are training your senses to see patterns you can return to, season after season, year after year. |
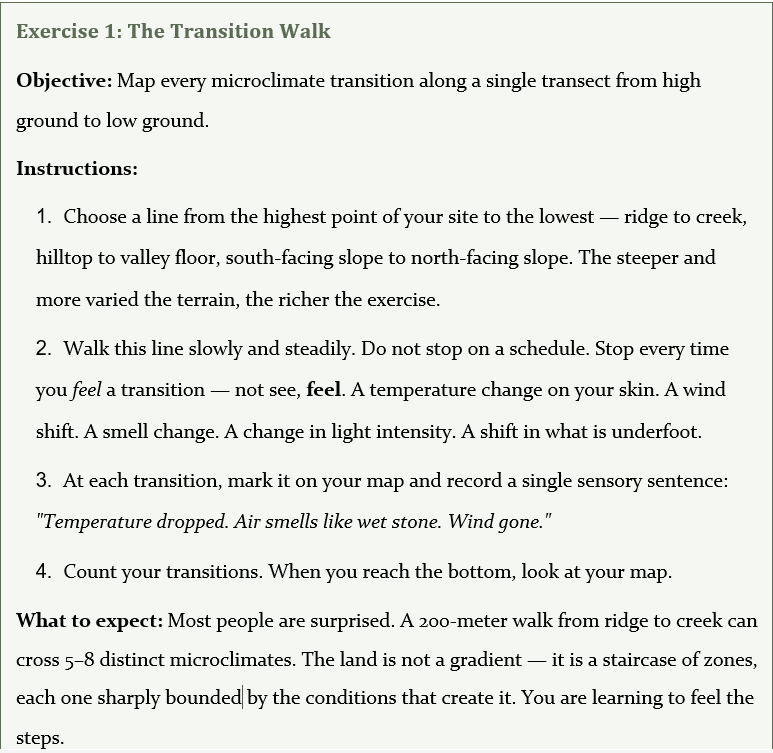
Mapping also trains a kind of attention that reading alone cannot develop. When you stop every fifty paces and ask, What shifted?, you teach your body to register changes that your conscious mind would normally smooth over. The slight drop in temperature as you cross into a north-facing slope. The moment the wind dies as you step behind a cedar stand. The instant your boots sink into clay instead of crunching on gravel. These are data points, and your body is the instrument.
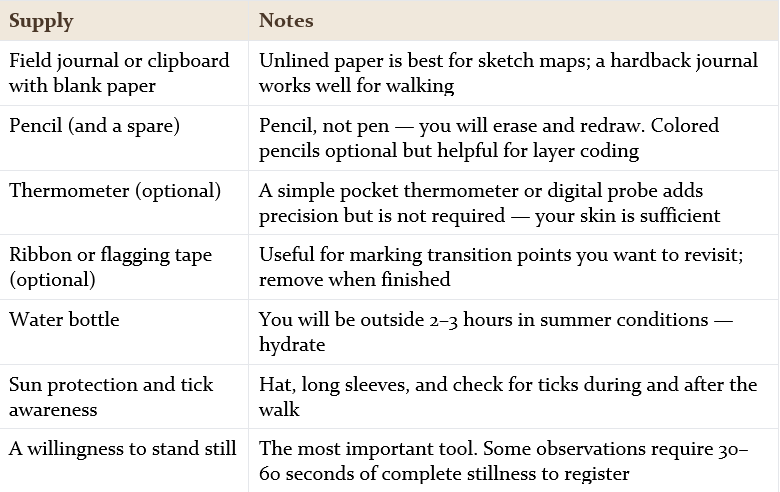
What You Will Need
Section 2: The Five Layers of a Microclimate Map
A complete microclimate map reads five layers simultaneously. In the field, you will not observe them in strict sequence — they arrive together, tangled, overlapping. But learning them as distinct layers first gives you a framework for organizing what your senses collect. Think of these as five transparent sheets laid over the same base map. Each one reveals a different dimension of the same landscape.
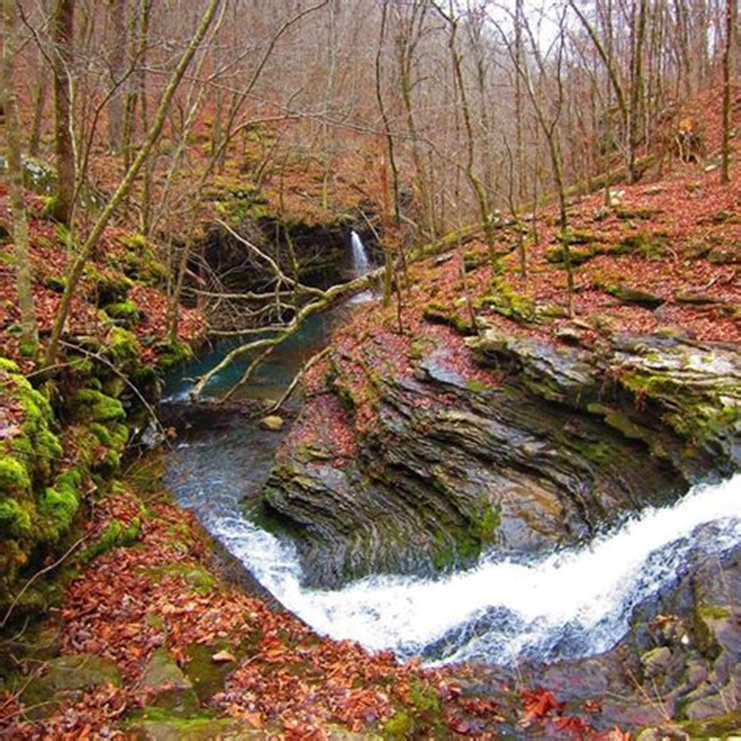
A deep Ozark hollow where water, shade, and cool air converge — three microclimate layers visible in a single glance.
Layer 1: Heat — Where Does Temperature Concentrate and Dissipate?
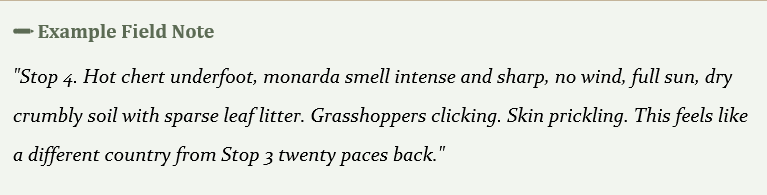
Heat is the most visceral layer. You feel it before you see it — the sudden warmth on your forearms as you step onto an exposed south-facing slope, the prickle of radiant energy rising off dark chert gravel. Heat drives volatile chemistry. The hotter and drier the site, the more a plant invests in aromatic defense compounds — the essential oils, the resins, the sharp-scented terpenes that herbalists prize.
What to Look For
● Heat sinks (absorb and radiate): south-facing rock faces, chert gravel flats, dark exposed soil, bare limestone ledges, dry ridge tops
● Heat sheds (cool and dissipate): north-facing slopes, deep hollows, creek corridors, dense canopy, spring heads, moss-covered stone
● Transition lines: the exact point where warm becomes cool — often marked by a visible change in vegetation
How to Sense It
● Skin: Hold your bare forearm six inches above rock or soil. Radiant heat is unmistakable — you can feel the difference between a sun-baked chert flat and a shaded loam in seconds
● Smell: Volatile intensity increases with heat. Lean close to aromatic plants at hot stops and compare — the same monarda will smell sharper, more pungent, more medicinal at a heat-concentrated site
● Sight: Shimmer lines above hot stone on summer mornings. Wilting leaf edges on heat-stressed plants. Dry, curled leaf litter that crunches underfoot
How to Mark It on Your Map
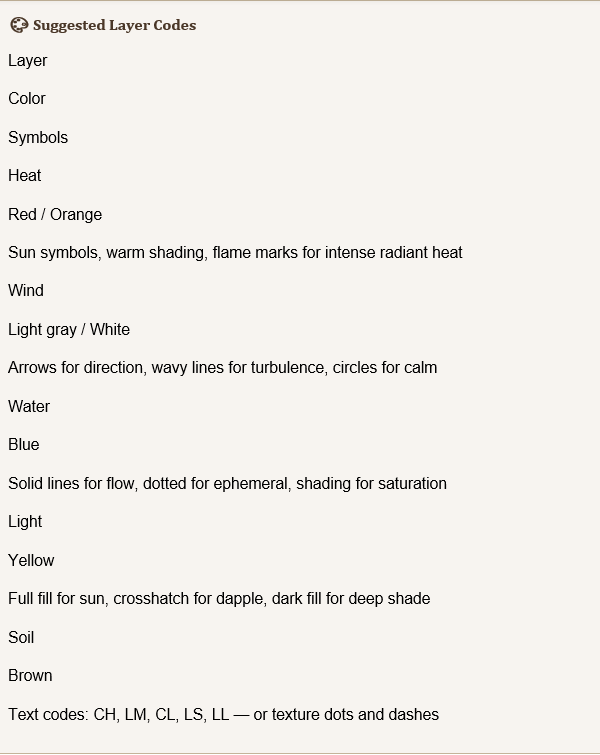
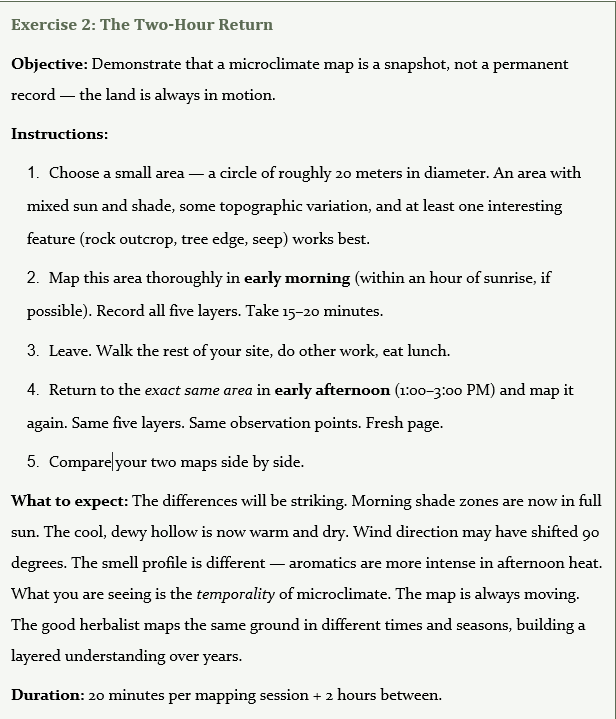
Use warm colors (red, orange, yellow pencil) or sun symbols for heat-concentrated zones. Cool zones get blue shading or shade symbols. Always note the time of day — your heat map changes hourly as the sun moves. A ridge that radiates intensely at 2:00 PM may be cool at 7:00 AM.
Layer 2: Wind — Where Are the Tunnels, Shelters, and Edges?
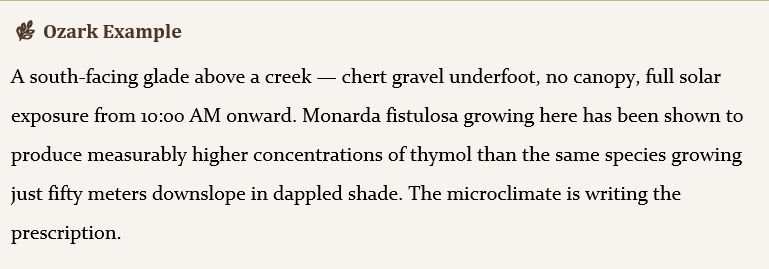
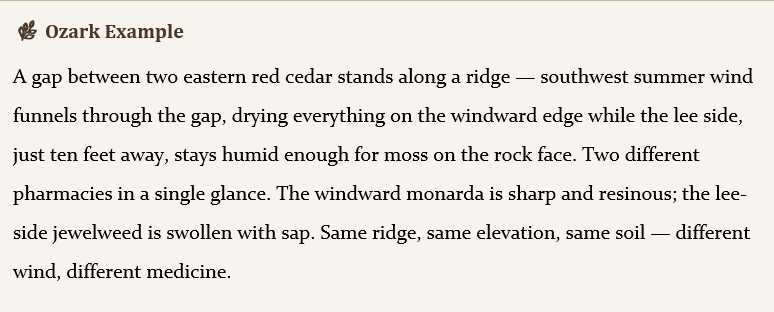
Wind is the invisible sculptor. It dries soil, strips humidity, cools surfaces, and distributes pollen and spore. For herbalists, wind matters because it creates drying gradients — and drying concentrates chemistry. A plant growing in a wind tunnel is under constant evaporative stress, which triggers defensive volatile production. A plant growing in a lee-side pocket, sheltered from the same wind, stays humid and relaxed, producing a different chemical profile.
What to Look For
● Wind tunnels: Gap corridors between ridges, saddles where wind funnels and accelerates, tree-line edges where canopy forces air to compress and speed up
● Shelters: Lee-side pockets behind ridges, dense cedar or juniper stands that block airflow, deep hollows where air stalls and humidity builds
● Edges: The boundary between wind and calm — often just a few feet wide — where turbulence creates swirling, unpredictable micro-conditions
How to Sense It
● Ribbon test: Hold a 12-inch strip of ribbon or flagging tape at arm's length. Direction is obvious; strength is readable from the angle of deflection
● Wet skin: Lick the back of your hand. Where it cools fastest, the wind is moving. In dead-calm pockets, the moisture lingers and you feel no cooling
● Sound: Listen for the difference between rustling canopy (wind present) and stillness (sheltered). Wind in cedars sounds different from wind in hardwoods — denser, hissing versus rattling
How to Mark It on Your Map
Arrows for wind direction. Wavy lines for turbulence zones. Small circles for calm, sheltered pockets. Note wind strength (gentle, moderate, gusty) and whether the wind was consistent or shifting during your walk.
Layer 3: Water — Where Does Moisture Gather, Flow, and Linger?
Water is the great mediator. It cools, it humidifies, it dissolves minerals, and it creates the conditions for a whole class of plant chemistry — the mucilaginous, demulcent, cooling medicines that herbalists reach for when the body is hot and inflamed. The water layer is also the most seasonal and weather-dependent: a seep that runs in April may be dry by August, and a hollow that fogs every morning in June may be clear and dry by late July.
What to Look For
● Permanent water: Spring heads, perennial creeks, seep lines that weep from rock faces year-round
● Ephemeral water: Seasonal streams, intermittent seeps, vernal pools that fill after rain and dry within days
● Atmospheric moisture: Fog-trap hollows where cold air pools and condenses, dew lines that persist past mid-morning, moss on north-facing stone (a living humidity indicator)
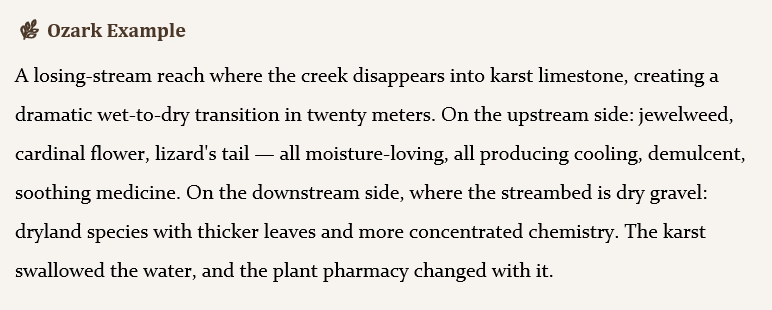
● Underground water: Karst features, losing streams where water vanishes into limestone, spring-fed wetlands
How to Sense It
● Temperature drop on skin: Water-influenced zones are cooler. You can often feel a seep line before you see it — the air temperature drops as you approach
● Smell shift: The smell of water in Ozark landscape is distinctive — geosmin (that earthy petrichor), wet limestone, watercress, decaying leaf litter in standing water. Each has a different character
● Sound: Drip, trickle, gurgle, or silence. The absence of water sound at a creek bed is data too — it tells you the creek is dry or losing
How to Mark It on Your Map
Blue solid lines for permanent flow. Blue dotted lines for seasonal or ephemeral moisture. Blue shading for saturation zones (seep areas, bog edges, fog-trap hollows). Note whether the water is moving or standing — the chemistry of plants growing in flowing water differs from those in stagnant moisture.
Layer 4: Light — Where Do Sun and Shade Draw Their Lines?
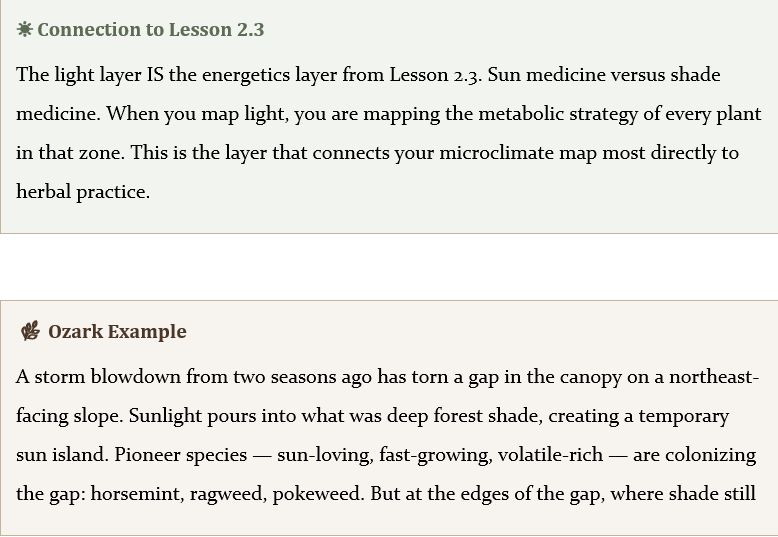
Light is the energetics layer — the one that most directly controls whether a plant makes "sun medicine" or "shade medicine," as you explored in Lesson 2.3. Full-sun plants produce volatile-rich, aromatic, warming chemistry. Deep-shade plants invest in alkaloids, glycosides, and the quiet, slow-acting compounds that herbalists associate with nervines and alteratives. The light layer is also the most dynamic: it changes hour by hour as the sun tracks across the sky, and it changes year by year as trees fall, gaps open, and canopy closes.
What to Look For
● Full sun zones: Glades, ridge tops, open pastures, south-facing slopes with thin canopy
● Dappled zones: Forest edges, canopy gaps, areas beneath open-crowned trees like oaks and hickories
● Deep shade: North-facing slopes under closed canopy, ravine bottoms, dense cedar stands
● Reflected light: Pale rock faces, water surfaces, and exposed limestone that bounce light into otherwise shaded areas
How to Sense It
● The squint test: Where does brightness force you to narrow your eyes? That is full sun. Where can you open your eyes wide and see comfortably? That is shade
● Shadow-edge sharpness: Hard-edged shadows mean direct, intense light. Diffuse shadows mean filtered, dappled light. No shadows at all means deep, even shade
● Plant leaf orientation:Leaves angled to catch light (horizontal, broad) are shade-adapted. Leaves angled to avoid light (vertical, narrow, folded) are managing excess sun
How to Mark It on Your Map
Yellow for full sun. Light crosshatching for dappled zones. Dark shading for deep shade. Always note the time — the light map shifts dramatically through the day. A spot that is full sun at 10:00 AM may be deep shade by 3:00 PM as the ridge shadow crosses it.

Layer 5: Soil — What's Underfoot?
Soil is the foundation layer — the one that changes slowest and shapes everything above it. Ozark soils are famously variable: you can walk ten steps from chert ridge gravel to deep alluvial creek bottom and feel the change in every footfall. Soil determines drainage, nutrient availability, root depth, and microbial ecology. For herbalists, it is the layer that determines which plants can grow at all, and how well they thrive.
What to Look For
● Chert gravel: Sharp drainage, heat retention, mineral-poor, drought-prone — plants here are stressed and chemically concentrated
● Deep loam: Moisture-retentive, nutrient-rich, soft underfoot — plants here are lush, vigorous, and chemically dilute
● Exposed limestone: Alkaline influence, thin soil, good drainage — supports a distinctive plant community
● Clay: Waterlogging, slow drainage, cool and heavy — favors moisture-tolerant species
● Leaf litter depth: Deep litter insulates soil, retains moisture, feeds fungal networks. Shallow or absent litter means exposed, sun-baked, fast-drying soil
How to Sense It
● Dig with a stick: Push a stick into the ground. Resistance tells you about compaction. Depth before hitting rock tells you about soil thickness
● Smell the soil: Fungal soil smells earthy and rich (geosmin again). Mineral soil smells sharp and clean. Sour, anaerobic soil smells of decay — waterlogged, oxygen-starved
● Feel texture: Rub a pinch between your fingers. Gritty is sand or chert. Smooth and slippery is clay. Crumbly and dark is loam. This takes practice, but even a first attempt teaches you to notice
How to Mark It on Your Map
Use texture symbols or brief written notes at each observation point. Simple codes work well: CH for chert, LM for loam, CL for clay, LS for limestone, LL for deep leaf litter. Color coding is optional.
Section 3: The Field Mapping Protocol — A Step-by-Step Guide
What follows is a clear, numbered protocol for a 2–3 hour field mapping session. It is written to work for solo self-study and for facilitated group labs alike. Read through the entire protocol before you go outside. Then bring your journal and go.
Phase 1: Pre-Walk (15 minutes)
1. Choose your site. Ideally, select a site with elevation change — ridge to creek, hilltop to valley, south-facing slope to north-facing slope. A familiar trail, the edge of your home property, a state park with topographic variety, a neighbor's pasture with their permission. You do not need wilderness. You need variation. A site with 50 feet of elevation change and mixed canopy is more instructive than a flat, uniform forest.
2. Sketch a rough base map. On a fresh journal page, draw the basic shape of your site: property lines or trail path, major landmarks (the big oak, the rock outcrop, the creek, the fence line, the old barn foundation). This does not need to be precise or to scale. It is a sensory document, not a land survey. Give yourself room in the margins for notes.
3. Note the conditions. At the top of your page, record:
○
Date and time: The microclimate map you make today is a snapshot of today
○
Temperature: If you have a thermometer, record ambient air temperature in shade. If not, estimate (warm, hot, mild)
○
Cloud cover: Clear, partly cloudy, overcast — this changes everything about your light layer
○
Wind direction and strength: From which direction? Gentle, moderate, gusty?
○
Recent weather: Did it storm last night? Has it been dry for a week? Rained two days ago? This sets the context for your water layer
Phase 2: The Walk (90–120 minutes)
● Heat: Warmer or cooler than your last stop? Radiant heat rising from rock or soil? Sun on your shoulders or shade on your back?
● Wind: Which direction? How strong? Sheltered or exposed? Constant or gusting?
● Water: Any moisture signs? Seep, dew, moss, fog, creek sound, wet soil, damp leaf litter?
● Light: Full sun, dappled, deep shade? What time is it and where are the shadows falling?
● Soil: What is underfoot? Gravel, loam, clay, rock, leaf litter? Soft or hard? Damp or dry?
● What species?
● Aromatic intensity (faint, moderate, strong, overwhelming)
● Aromatic character (sweet, sharp, resinous, green, bitter, spicy)
● What microclimate conditions surround this plant?
Phase 3: Post-Walk Synthesis (30 minutes)
● "The hot shelf"— south-facing, full sun, chert, no wind, no water
● "The fog pocket"— hollow floor, deep shade, morning moisture, still air, deep litter
● "The wind gap"— saddle between ridges, gusty, dry, partial sun
● "The dark hollow"— north-facing ravine, deep shade, seep water, clay soil
● A sun-baked ridge monarda should be volatile-rich — sharp, potent, warming medicine
● A deep-shade black cohosh should be alkaloid-emphasized — slow, deep, nervine medicine
● A creek-side jewelweed should be succulent and cooling — soothing, demulcent, anti-inflammatory
Section 4: Three Field Exercises
These exercises can be done during your mapping walk or as separate outings. Each one develops a different aspect of microclimate literacy. Facilitators: any of these works well as a group activity (see Section 6).
Section 5: Reading Your Map — Interpretation Guide
You have walked, observed, and drawn. Now the map speaks back. This section teaches you to read the patterns your map has revealed — and to translate landscape into medicine.
Pattern Recognition Prompts
Study your completed map and ask these questions. Each one points to a different kind of medicine the land is making:
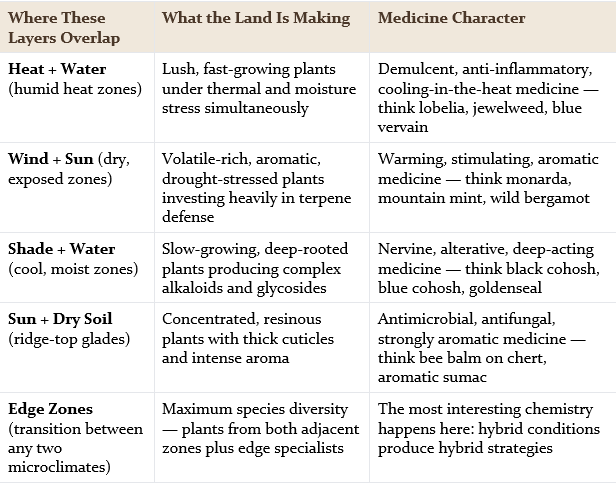
Additional Prompts for Your Map
● Where would you go to harvest cooling medicine? (Follow the water and shade layers)
● Where would you go to harvest warming medicine? (Follow the heat and wind layers to the exposed ridge)
● Where would you go to harvest nervine medicine? (Follow shade and water into the quiet hollows)
● Where are the edges — transition zones between two microclimates? (These are where diversity concentrates and where the most interesting chemistry happens)
● Where would you never harvest? (Disturbed areas, eroded banks, places with obvious chemical contamination — the map shows these too)
The Medicine Map
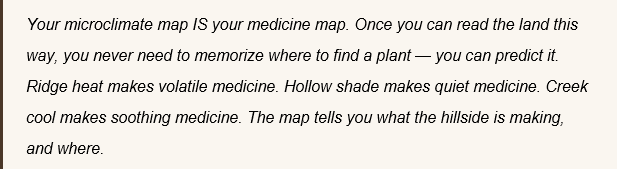
This is the central skill of Ozark herbal ecology. Field guides tell you what a plant looks like. Chemistry references tell you what compounds it contains. But only the land itself tells you where that chemistry will be strongest, and why it changes from ridge to hollow, from sun to shade, from windward to lee. The map you drew today is rough, personal, and imperfect. It is also more useful than any photograph or textbook figure, because it records what you felt — and feeling is the herbalist's primary instrument.
Over time, you will return to this site in different seasons, different weather, different years. Each visit adds a layer to your understanding. The monarda that was volatile-intense in July drought may be milder after August rains. The fog pocket that was thick in June may dry out by September. The medicine map is never finished. It grows with you.
Section 6: Key Concepts Summary
● Five mapping layers: A complete microclimate map reads heat, wind, water, light, and soil as simultaneous, overlapping dimensions of the same landscape
● The body as instrument: Your skin, nose, ears, and eyes are your primary data-collection tools. Thermometers and ribbons supplement but do not replace sensory attention
● Transition zones are data points: Stop where you feel a shift. The boundary between two microclimates is where the most information concentrates — and where plant diversity is highest
● Time-sensitivity: A microclimate map is a snapshot. Heat, light, and wind change hourly; water changes with weather and season. Map the same site at different times to build a layered understanding
● Sensory first, analytical second: Record what you feel during the walk. Interpret after the walk. The journal entry is sensory data; the synthesis is ecological reasoning
● The medicine map concept: A microclimate map IS a medicine map. Landscape position predicts plant chemistry — ridge heat produces volatile medicine, hollow shade produces alkaloid medicine, creek corridors produce cooling medicine
● Plant chemistry predictions: Use microclimate data to hypothesize about the potency and character of plants at each site. Then test your predictions through crush tests, harvest comparisons, and practice over time
● Edge effects: The most interesting chemistry and the greatest species diversity concentrate at edges — the transition zones between two distinct microclimates
● Naming your zones: Personal, sensory, memorable names for the microclimates you discover anchor your knowledge to place and make it retrievable in practice
● Integration across Module 2:This field practice synthesizes the three theaters of summer (2.1), storm dynamics (2.2), and light exposure / sun-shade energetics (2.3) into a single embodied skill
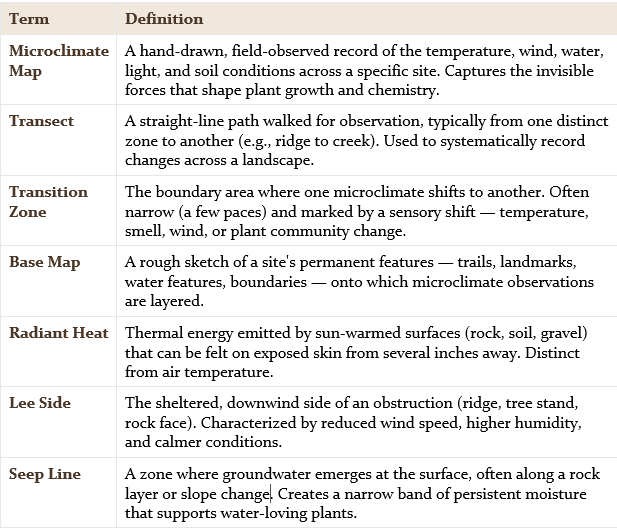
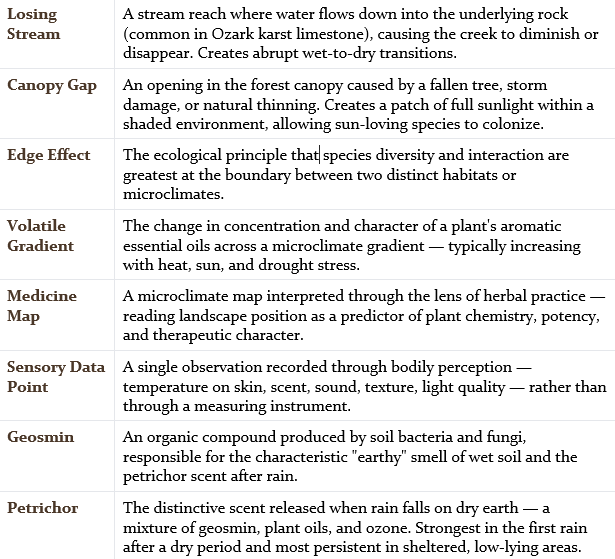
Glossary
Section 8: Module 2 Closing — The Map in Your Hands
You have completed Module 2: Microclimates of Summer.
Look at the arc you have traveled. In Lesson 2.1, you learned the three theaters — the steady-state architecture of an Ozark summer hillside, where ridge heat, hollow humidity, and creek cool each create a distinct world within walking distance. In Lesson 2.2, you stepped into the storm edge, where wind shifts and pressure drops create temporary microclimates that flare into existence and vanish within hours, leaving their marks on the plants that endured them. In Lesson 2.3, you stood at the line between sun and shade and discovered that light is not merely illumination but instruction — the force that tells a plant whether to make warming, volatile medicine or cooling, alkaloid medicine.
And today, in Lesson 2.4, you took all of that knowledge outside, put your feet on the ground, and used it. You have a map in your hands — imperfect, personal, hand-drawn, alive with your own sensory notes — and that map is the most useful herbal document you have created so far in this course. It is not a textbook figure. It is a record of your own attention, a portrait of a hillside as read by your skin and nose and ears. And it is the foundation of a practice you will deepen for the rest of your life as an herbalist.
You can read the land now. You know where heat concentrates, where water lingers, where shade deepens the chemistry, where wind strips the moisture and drives the volatiles to the surface. You know that the hillside is not one place but many — and that every ten paces might bring you to a different pharmacy.
Coming Next